If you’ve lost your Windows DVD, or you never had one, you can still reinstall Windows without it, using a USB flash drive.
In this article we’ll explain to you how to install Windows using a USB flash drive, starting with how to create a bootable flash drive that you will use to install Windows and how you can use this bootable flash drive to install windows.
Here’s how to install Windows using a USB flash drive.
Creating a bootable USB drive
Before you load the Windows Image File on the USB flash drive to make it bootable, you must have power ISO software installed on your computer.
This can be downloaded online for free.
Make sure you have a 4GB USB flash drive or 8GB for a 64bit version of Windows operating system.
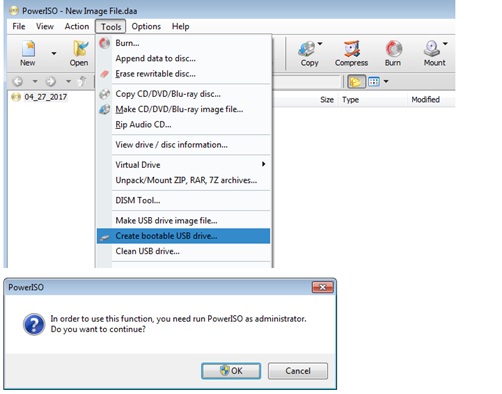
After installing PowerISO, launch it on your computer and insert the USB drive you intend to boot from into your computer.
After this, choose ‘Tools > Create Bootable USB Drive’ as shown below.
When the ‘Create Bootable USB Drive’ dialog pops up, click OK on the UAC dialog to continue.
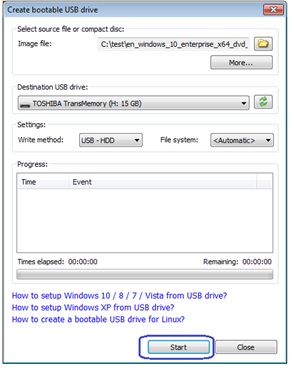
In “Create Bootable USB Drive” dialog, click ‘…’ button to open the ISO file of the Windows operating system.
Select the correct USB drive from the “Destination USB Drive” list, if multiple USB drives are connected to the computer.
Choose the proper writing method. ‘USB-HDD’ is recommended.
After picking the writing method, click the ‘Start’ button to start creating bootable USB drive.
PowerISO will alert you that all data on USB drive will be destroyed. Click “OK” to continue.
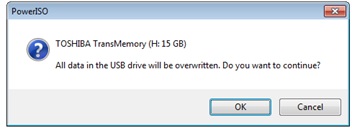
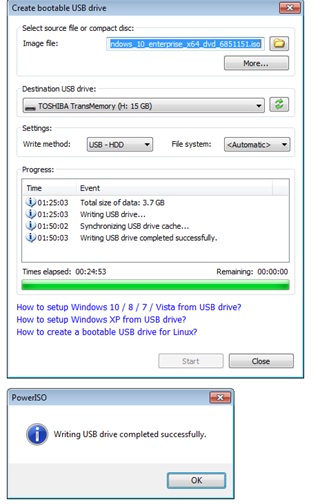
The program will start writing USB drive. It will also display details of progress.
You should get the message “Writing USB drive completed successfully” after the operation completes.
At this point, after the above procedure, you are fully set and ready to install Windows using a USB flash drive.
Things to consider when you are to install Windows using a flash drive
If you’re planning to do a fresh install and format the hard drive as part of the process, make sure you’ve backed up all your documents, music, photos, videos and other files you don’t want to lose.
You can now reboot/restart your computer and go into the BIOS configuration to boot from USB.
Instructions for doing this vary from system to system, but generally entail the following:
So, while your computer is starting up (immediately after pressing the power button), press the key that opens the boot-device selection menu (BIOS configuration) for the computer, such as the Esc/F10/F12 or Delete.
These Hotkey instructions are provided on the screen as the computer boots.
Select the option that boots the PC from the USB flash drive.
With your USB drive plugged in, the USB drive should be listed. If it isn’t, your system might not support booting from USB.
Assuming that it is supported (as is the case with virtually all modern hardware), promote your USB drive to the primary boot device.
After the above, exit from the BIOS configuration and save all the changes.
[ot-video][/ot-video]
Windows Setup starts
Follow these instructions to install Windows using a USB flash drive.
Assuming that you properly configured your BIOS and your USB drive supports booting, Windows setup should now load.
Depending on the speed of your USB drive, this may take a while.
After your computer has been able to boot from the USB flash drive, it should first present an option to choose the language and maybe also the exact version to install.
Just make sure you pick the right settings.
Continue to follow the on-screen prompts for installing Windows.
The above guide works with Windows 10, Windows 7, Windows 8 / 8.1, or Windows Vista.
Related:
How to download WhatsApp status updates posted by your contacts
WhatsApp set to be Africa’s biggest payments and ad platform